Monday, May 3, 2010

Honey Rye Sourdough Yeast Bread


Now that you have all made some great sourdough starters, or at least read my how-to, here is a recipe for a very yummy honey rye bread. It's one of our favorites and who knows, maybe it will be yours as well?!

It is a mixed flour bread, with both rye and wheat flour, so the rye is not too overpowering. Just enough to give your tummy something to work on. :-)

I'm going to start you off with a bread that has both sourdough starter and yeast. To ensure your success, although I have complete faith in you being able to do this!

A note about yeast: I use bread machine yeast (also called instant active dry yeast) which comes in the small glass containers. Once the bottle is open, I store them in the fridge. Since I bake bread almost every weekend, this works well for me. If you are used to baking with other kinds of yeast, fresh (Lucky you!) or active dry yeast, you can use this conversion table to figure out just how much to use.There's one more thing to remember about yeast: dry yeast can be added with all the other dry ingredients (like the flour) while fresh yeast will need the warm liquid to dissolve in before you proceed. There are a million different opinions on how to add the yeast to your bread - throw it in and hope for the best, that's how I do it!

These loaves are on the small side. I've doubled the recipe before, so you should be able to, and then just bake them a few minutes longer. Maybe double the recipe and make three loaves as my friend suggested.

Honey Rye Bread with sourdough starter
1 1/4 cups of warm water
1.5 tablespoons honey (I've used both raw honey and "regular" honey)
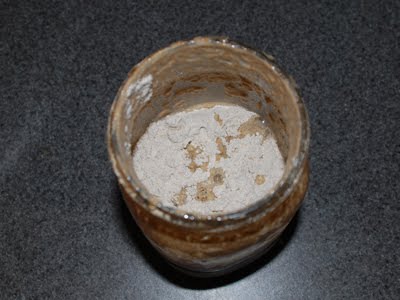
2 tablespoons rye sourdough starter

1 1/4 cups bread flour

6 - 7 tablespoons all purpose flour
1 1/4 cups rye flour
2 1/4 teaspoons bread machine yeast
2 teaspoons salt

Mix all ingredients in mixer (or in a bowl by hand if you want to!)
.

Run 3 minutes on low (Knead by hand for 6 minutes).
Run 9 minutes on medium (Knead by hand for 10 minutes).


Let the dough rest for 90 minutes with a kitchen towel covering the bowl.

Here is my dough after the first rise. It should double in size.

Pour the dough out on a floured tabletop and cut it into 2 pieces (or 3).


Form round balls with your dough, and then stretch them by turning and pushing the dough up on the underside....so that the dough stretches across the top.

Pushing the dough up on the underside while stretching with my hands.
Move the bread round in your hands to stretch evenly on all sides.


Stretched bread dough.

Let the dough balls rest for 10 minutes under a kitchen towel.
Form into oblong shapes using this simple technique:

1. FLatten the dough by pushing down with your hands to form a rectangle.

Gently pull on the edges and flatten with your fingers
until you have a 10-12 inches by 6-7 inches rectangle.


1. Fold one long edge over to the middle.
2. Fold the other long edge over to meet in the middle
3. Fold the two folded edges together
4. Roll slightly to get everything to stick together

Place your loaves on a cookie sheet covered with parchment paper.

You can add a design by cutting with a sharp knife across the top - lengthwise.

Let the breads rise under a towel for 60-90 minutes - until double in size.


Turn oven to 480 F. (or as close as your oven gets!)

Put your loaves in the oven and spray some water into the oven.
You can also add some icucubes to a tray underneath your bread.
Lower the temperature to 425 F and bake for 25-35 minutes.
Let your loaves cool on a rack under a kitchen towel.

Enjoy! If you bake this - please leave me a comment and let me know how it went!

Thursday, April 22, 2010

Helpful Hints: Sourdough Starter

My dear and beautiful blog-friend Lisa over at Molti di Moda blog has asked me to write a guest blog on the topic of Helpful Hints for Daily Living. I am so honored that she chose to feature me, and I hope everyone enjoys this blog post!

I love to bake bread and lately I've been especially interested in baking sourdough bread. There is just something special about sourdough breads; the way it smells, how it tastes different. I've read that sourdough bread is easier to digest and healthier for your body as well.

For my helpful hints post, I am going to give you two recipes for starting sourdough - these are called sourdough starters and I keep a rye version and a wheat version in my fridge at all times. I feed them about once every week and a half and use them for some of my breadbaking.

A mixed flour sourdough made with wheat and spelt flour.

If you are new to sourdough making, I suggest you start with the rye sourdough starter. It's a lot easier to get a rye sourdough started, probably because it's a whole grain and has more of the "good stuff" in it. When you have a good rye sourdough starter, you can use some of it (a tablespoon or so) to kick off your wheat sourdough starter.
Today I will post the sourdough starter recipes and instructions and sometime soon, I will
post a few sourdough bread recipes for you. Here we go! Make sure you have: Water (ha!) Rye flour - I like a sifted version, not a very coarse rye flour. Bread flour Wide mouth canning jars with 2-piece lids. You can use regular glass jars as well, but I've found wide-mouth canning jars to work really well. I highly recommend organic and stoneground type flours if you can find them at a decent price. They too seem to have more of the good stuff in them and make for better sourdough starters.

Rye Sourdough Starter


First Day - Morning
1/2 cup warm water (not hot!)
1/4 cup rye flour


Mix the water and the flour in a glass jar until there are no more lumps of flour. Wide mouth canning jars work great, especially with a 2 piece lid. Put the lid back on, but don't screw it on. We need air to make this work!
Put the jar in a warm place such as above the fridge. Let the jar stand for 3 days and lightly shake it every 12 hours or so.
Flour and water added.

4th Day - Morning
Add the following to your mixture:
1/2 cup warm water (not hot!)

3/4 cup rye flour


Mix until no more lumps of flour. Put the jar back in the warm spot.

Starting to bubble...

4th Day - Evening

Add the following to your mixture:

1/2 cup warm water (not hot!)

1/2 cup rye flour


Mix well and let stand for 12 hours.

The finished rye starter.
Your starter should smell nice and yeasty now. The consistency should be like chocolate mousse, bubbly on top. If you're going to use your starter, go ahead and do so. If not, you should put your jar in the fridge.

The beginnings of my wheat starter.

Wheat Sourdough Starter

First Day - Morning

1 tablespoon rye sourdough starter

1/4 cup warm water (not hot!)

1/2 cup bread flour

Mix the water and the flour in a glass jar until there are no more lumps of flour. Put the lid back on, but don't screw it on. Put the jar in a warm place such as above the fridge. Shake it every 12 hours or so.

Wheat starter halfway through

Second Day - Evening (a day and a half or 36 hours later)

Add the following to your mixture:
1/2 cup warm water (not hot!)

3/4 cup bread flour


Finished wheat starter.

Mix well and let stand for 12 hours. Your starter should now be nice and bubbly and have nice volume. If you don't see this - let it stand for another 12 hours, check again. If no activity, pour out half the mixture and repeat the second step above adding new water and flour.
If you are not ready to bake, place your starter in the fridge.

Coming up next - my favorite rye honey sourdough bread and how to keep your sourdough starter alive!
Happy Baking!

Wednesday, April 21, 2010

Potato Planting Pictures

All the taters in a row....

About 3 weeks ago, we got our potatoes in the ground after some nice warm weather. Our wonderful neighbors let us have several truckloads of horse manure which we spread out over the Lakeside Garden plot. Some of it was not composted, so we let it sit on top and burn for a few weeks. Then Sean used the tiller and created these long rows that we planted in.

We had gotten the hoops that you see in the pictures, and fabric to cover the ground for cold weather, but it turns out we've not had to use them at all. We've had weather in the 70s to 80s consistently now for a few weeks. Go figure - oh well, we will probably use them for winter gardening then!
We've planted All Red, All Blue, Carola, German Butterball and Yellow Fin potatoes. We planted them in offset rows with a thin layer of dirt on top and then added about 6 inches of straw. As the potatoes start to come up, we will hill the soil around the plants.

Between then and now, we've also planted corn, beans and squash between the two sides of potatoes. Oh, and I'm planting some cotton as well. Just for fun and to see how it grows and how hard it is (so I've heard) to harvest it.

We are very excited about the start of our garden this year. I'll have more updates from the House Garden soon! :-) Happy Gardening and I hope your gardens are taking off as well!

Saturday, April 10, 2010

Happy 5th Birthday Kane!


Sweetpea. Baby Kane. Kane-kane. Cutiepie.

Last weekend was your 5th birthday. You are my constant companion, my second love, my buddy, my protector, the best dog that ever walked a bride down the aisle, my joy and my happiness.

Right now I watch you take a nap on your spot on the couch. One of the few moments you actually stay still! That spot on the couch where you can simultaneously keep an eye on the patio door, the yard outside, the cats upstairs and where your people are and what they're up to. You're awake in a nano-second if I even hint at going upstairs (cats!), getting a treat from the pantry, picking up my keys (car ride!).

Oh, how I love you. How much fun we have together and how much we are going to have this year.

This is the year when I plan for us to get some titles in Schutzhund. Maybe a 1 and a 2, and maybe something else - who knows? Some good hikes, camping, car rides. You've learned to go with us on mountain bike rides as well.

Thank you, Kane. For being in my life. For licking my face. For snuggling up with me on the couch and keeping my feet warm. For protecting me, making me feel safe. For showing me just how much joy there is in life, for slowing me down to enjoy everything with you. For bringing me new friends through schutzhund. For loving me back and making my heart feel like it's overflowing. For filling a void in my life I never knew I had. Happy 5th birthday (4/3/2010). I love you lots.

~Mom

Sunday, April 4, 2010

Front door surprise

What I think is a House Finch has decided that the perfect place for her nest and eggs is our front door wreath! There are two small adorable little eggs in her nest. They are greenish blue with just a few black brownish spots.
Now I will have to put up a sign for the UPS-Fedex guys to not disturb the mama and her young!

What an adorable surprise for Easter!

Monday, March 29, 2010

Tomato Plant Restraint. I have none.

Pretty Costoluto Genovese

Tonight I started transplanting my tomato seedlings. Way overdue. They were growing into the growlights....oups.


I thought I was showing some real restraint this year by only doing 4 or 5 plantings of each type of tomato: Costoluto Genovese, Hungarian Italian Paste, Yellow Pear Cherry, Riesentraube Cherry and German Pink.


The problem is/was that both seeds in each soil block germinated. Sometimes a third one that slipped in germinated too. And I am so NOT a tomato plant killer. I just can't do it. I let them grow and then tonight I started separating them. Successfully I hope. So I end up with 8 - 10 of each kind.

Basic math: 5 varieties of tomato plants X 10 plants = 50 tomato plants.
Wow.

Hungarian Italian Paste Tomato

Friends- you had better come out of the woodwork right this minute and demand that I give you tomato plants for your garden. And I was laughing (silently) at a fellow blogger writing she had over 40 tomato plants. What a crazy person, I thought. Well here I am, just as crazy (and loving it!).

German Pink Tomato

Now I'm out of pots. And out of transplant mix. Sigh. Home improvement store at lunch tomorrow. Just think of all the salsa we'll be making...and I promise to show an equal lack of restraint in eating whatever we end up producing. This gardening season is off to a GREAT start! Hooray!

That's great, mom. Could you come back inside and feed me now? I'm like...starving here.

Hoping everyone's garden is off to a great start. If not, you know where you can find free tomato plants now.

Thursday, March 25, 2010

Chocolate Sticky Cake

Raise your hand if you have a relationship with chocolate!

I do. I love chocolate. It rewards me through taste, but hangs around in the most inconvenient places. :-)

I also love to bake. When I need a quick chocolate fix without a ton of work, and a recipe that doesn't make oodles and oodles of cake, I refer back to my Swedish Sticky Cake recipe.
I have a small recipebook where I write down my favorites, and next to this cake recipe is the name of my childhood friend Anna J. She's a Facebook friend now, just welcomed her second child into this world, little Amelie, and has a good life with a husband and a young son. We baked this cake A LOT way back when. We even formed an organization, whose name is written down next to the recipe: The Organization for Spreading the Word of Sticky Cake's Greatness
We had some lofty ambitions, let me tell ya....

I would love it if you would join our organization and make this recipe:

2 eggs
1 stick of melted butter
1 1/4 cup sugar
2/3 cup all purpose flour
a pinch of salt
3-4 tablespoons of cocoa

Preheat your oven to 390F.
Mix all ingredients in a large bowl. I usually just mix with a spatula.
Refrain from eating the mix. :-)
Place a heaping tablespoon full of mix into muffin cups in a muffinpan (or regular cookie sheet).
Bake for 15 minutes.

You can also make this cake in a small ovenproof dish, just bake it for about 20 minutes instead and make sure you grease the sides of the dish before adding the sticky cake mix. This version of the sticky cake tastes great with a scoop of icecream.

Dig in with a glass of milk, or tea, or coffee....

Welcome to The Organization for Spreading the Word of Sticky Cake's Greatness. We are so glad you could join us.