
 My dear and beautiful blog-friend Lisa over at Molti di Moda blog has asked me to write a guest blog on the topic of Helpful Hints for Daily Living. I am so honored that she chose to feature me, and I hope everyone enjoys this blog post!
I love to bake bread and lately I've been especially interested in baking sourdough bread. There is just something special about sourdough breads; the way it smells, how it tastes different. I've read that sourdough bread is easier to digest and healthier for your body as well.
For my helpful hints post, I am going to give you two recipes for starting sourdough - these are called sourdough starters and I keep a rye version and a wheat version in my fridge at all times. I feed them about once every week and a half and use them for some of my breadbaking.
 A mixed flour sourdough made with wheat and spelt flour.
If you are new to sourdough making, I suggest you start with the rye sourdough starter. It's a lot easier to get a rye sourdough started, probably because it's a whole grain and has more of the "good stuff" in it. When you have a good rye sourdough starter, you can use some of it (a tablespoon or so) to kick off your wheat sourdough starter. Today I will post the sourdough starter recipes and instructions and sometime soon, I will post a few sourdough bread recipes for you. Here we go! Make sure you have: Water (ha!) Rye flour - I like a sifted version, not a very coarse rye flour. Bread flour Wide mouth canning jars with 2-piece lids. You can use regular glass jars as well, but I've found wide-mouth canning jars to work really well. I highly recommend organic and stoneground type flours if you can find them at a decent price. They too seem to have more of the good stuff in them and make for better sourdough starters.
Rye Sourdough Starter
First Day - Morning
1/2 cup warm water (not hot!)
1/4 cup rye flour
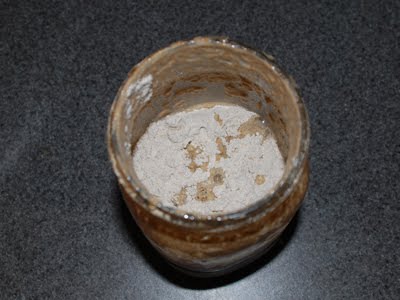
Mix the water and the flour in a glass jar until there are no more lumps of flour. Wide mouth canning jars work great, especially with a 2 piece lid. Put the lid back on, but don't screw it on. We need air to make this work! Put the jar in a warm place such as above the fridge. Let the jar stand for 3 days and lightly shake it every 12 hours or so.
 Flour and water added.
4th Day - Morning
Add the following to your mixture:
1/2 cup warm water (not hot!)
3/4 cup rye flour
Mix until no more lumps of flour. Put the jar back in the warm spot.
 Starting to bubble...
 4th Day - Evening
Add the following to your mixture:
1/2 cup warm water (not hot!)
1/2 cup rye flour
Mix well and let stand for 12 hours.
 The finished rye starter.
 The beginnings of my wheat starter.
Wheat Sourdough Starter
First Day - Morning
1 tablespoon rye sourdough starter
1/4 cup warm water (not hot!)
1/2 cup bread flour
Mix the water and the flour in a glass jar until there are no more lumps of flour. Put the lid back on, but don't screw it on. Put the jar in a warm place such as above the fridge. Shake it every 12 hours or so.
 Wheat starter halfway through
Second Day - Evening (a day and a half or 36 hours later)
Add the following to your mixture:
1/2 cup warm water (not hot!)
3/4 cup bread flour
 Finished wheat starter.
Mix well and let stand for 12 hours. Your starter should now be nice and bubbly and have nice volume. If you don't see this - let it stand for another 12 hours, check again. If no activity, pour out half the mixture and repeat the second step above adding new water and flour. If you are not ready to bake, place your starter in the fridge.
Coming up next - my favorite rye honey sourdough bread and how to keep your sourdough starter alive! Happy Baking!
5 comments:
Lena -
I have not had great success with this before - but you do make it look so easy - so just for you - I am trying it one more time! Thanks for the tips - keep your fingers crossed.
Vicki
This is such a GREAT post! You are so talented...I never knew rye was easier to start...Your photo tutorial is really great because now I'll know what mine is supposed to look like along the way. Thanks so much for posting!
I have thought about trying it but it just seems so intimidating to me, therefore I have not try it yet.
With your tutorial, I think I will give it a try! Thanks!
The only other question would be, how often do I need to use the starter? I don't really bake bread too often, once every few weeks maybe, so what should I do?
Wow, you are amazing! We're talking "bring home the bacon and fry it in the pan" special. Such a good post.
Thanks for a wonderful tutorial! I still haven't attempted my own starter yet so this is very helpful! :-)
Post a Comment